

I happened to be out taking pictures before work Monday morning, thanks to the reminder to practice with the aperture, by Sarah at The Winthrop Chronicles. This gerber daisy had a double-headed bloom, which was unusual, so I thought I'd better compose a shot before the sun had a chance to start bleaching it out.

This dahlia was a good subject.

There is something about the variation of color as well as the lights and darks that make them very photogenic. That's about all I had time for that day. I didn't have a lot of success with getting the aperture as low as I wanted, but that, in part, had to do with the lens I was using. My time did net me these dahlia shots though, and I was quite pleased with them.

The mockingbirds have a nest in bush at my friends house. Usually if we come anywhere near a mockingbird's nest, they dive bomb us, but on this day, the mother just flew off when we approached and watched us from a nearby perch as we got in close, stuck the camera in the bush and tried to get a decent shot of her eggs waiting to hatch.

On Wednesday evening (trash day's eve) here by us, Casey and I were on our way to the gas station and to Publix when I spotted these sticking out of a pile on our street.
Once our errands were through, I managed to coerce her into stopping, and just as we rounded the corner to the pile, a truck came from the other direction and turned in front of us. He slowed as he passed the pile, but he kept going. We stopped, and I jumped out to nab the planters. As I crossed the street and reached into the pile, I noticed the truck had turned to come back. Not sure if he was coming back to look through the pile or not, but I got the goods and he drove on. You snooze, you lose, and these ended up coming in handy later on in the week. You'll see.

The other night, quite late, I spotted this guy outside on my clothesline that hangs under my back patio awning. Talk about beady eyes... and his little neck was beating like crazy. Maybe it was his heart, but if it was, his heart was in his throat (ha!).

Then yesterday afternoon, I went to turn on the faucet to water my flowers. These little baby lizards thought that they were at a waterpark. They climbed all over this handle, but didn't seem inclined to let me get my hands on it no matter how close I got. I went to get my camera and they were still there when I came back.
These lizards assume I pose no threat. Unfortuantely, I have accidentally helped a few meet their maker, so they better look out! After this, I went inside, and while on the phone, I found two little ones in my house and had to shoe them out while I talked. They are overpopulating my property. Lizards are house guests that do not seem to know the bounds of common decency. They sneak in unannounced and never leave without being chased out the door. Enough with the lizards already!

I saw this cute idea over at The Decorating Files and thought I'd give it a try. Peggy had her paper plate boxes displayed with popcorn in them, but I thought I'd see how they do as hibiscus holders. Her boxes were much nicer. I tried to wing it and do it from memory and didn't cut them right (I cut pieces off, which she didn't do). Check out her tutorial and you'll see how easy it is to make these (if you follow the directions). You'll also see how much better hers look. :)

I didn't have the gumption to go searching through my supplies to find my raffia, so I just tied twine around mine as a simple way to hold them together.


It really does add a lot to the living room to have colorful flowers in the center of the big coffee table and the little boxes made a cute and easy temporary display.
But enough photos of that. Onward...

Becky at Timewashed had a great little tutorial on painting bottles with acrylic paint. I have quite a few bottles and jars and thought that if colored, they would make a nice addition to my coffee table when there are no flowers available.
I began with a test jar that I could easily get to the inside of, so that on the off chance I screwed this up royally, I could clean the paint off the inside and reuse it for the purpose for which I have been saving it.

I poured some acrylic paint in the jar and then some more and then more again...it takes more than you might realize, especially if your paint is a bit thick.

I recommend thinner, runnier paint for this. Otherwise it's hard to get it to roll around and cover the glass. One of the paints I used was perfect. Others were pretty thick. I'm sure I could have thinned it and it would have worked fine. I'm learning.

Once covered, I tipped it upside down to drip and dry. It took overnight to really dry well. See Becky's post for good instructions. It really is a quick project with a lot of bang for no real investment. I already had bottles and paint. They didn't come out perfectly, but good enough for my purposes.

I had to wait for hours for Casey to get home so someone would be there to drive me to the hospital in case heaven forbid, there was an emergency. I wasn't taking any chances. I was exceedingly careful, being a new circular saw user, but just in case, I thought it wise to have a driver in case I made a grave error while cutting. Thankfully, this was not necessary.
So those planters I got in the trash on Wednesday became my sawhorses. A bit hesitant about attempting the use of the circular saw for the first time, and having been busy for three weekends in a row, I finally gave it a go.
Once I read the operating instructions and some basic information online, I stepped up to my makeshift saw horses and started in on my project. Casey took some pictures of me out there, but most involved close ups of my rear, which seem to be her trademark. I had to delete them all. In this shot, it looks like I am wearing orchids in my hair, but I assure you, there was no such "pretty" going on. I was wearing safety goggles (which leave indentations around my eyes) and I had on my go-to yardwork outfit. I was sweaty and ended up covered in sawdust, and my hair was in a rats nest by the end of the day. There wasn't a bit of pretty to be found. Maybe I should have put flowers in my hair.


More mess from my sunny back patio workshop

Here is one of the headboards. I had already moved one plank of the wood up (it used to be where the lighter spots on the wood are.) I needed to cut the legs down. So this was to be my first really big cut of thick wood.

Waa laa! Did it. Loved it. It cut like butter. It was exciting to zip right through such a thick piece of wood. I felt so accomplished too. Casey came out and held the wood for me. Having an assistant is a huge plus. After I cut both of the headboards, I abandoned that project to move on to the next while I figure out how that planter is really going to come together. I'm not good at planning. I just think stuff up in my head without really putting it on paper in the form of measurements, etc. Sometimes that works and then sometimes you hit a sticking point where you haven't thought things through well enough to know what to do next. I'll have to get back to that project later. Other simpler ideas were calling me.
I had this other wood I found in a pile in an industrial area. I was going to use it to cover a cabinet I found in yet another trash pile (are you sensing any habitual behaviors here?), but I changed my mind and ended up using it for a new project instead.
This was actually the very first piece I cut with the new saw. I started with this thinner piece of wood to get the feel for using the saw. Actually, it was my first cut ever with a circular saw that I can remember. I know, I guess I'm just a late bloomer. I suggest you not wait until you are at an advanced age before you accomplish this skill. A whole world of possibilities has now opened up to me. It's like being set free from a sort of bondage once you can cut your own wood. You no longer have to agonize over asking your neighbor or waiting for someone handy with construction to stop by or dragging all your wood to someone else's house. You can do it yourself!

Not Bad.
Some of this wood was already joined lengthwise. I decided to make long wood boxes with them to use as table center pieces. I have seen these many times so I don't have any particular person or blog to which I can point you. I just knew I'd seen long wood boxes on tables, and the wood I had seemed to lend itself to such a purpose. So I was winging this.
Update: I just saw that I have a picture of one of the boxes on my Pinterest board. It was from Hyacinth For The Soul.
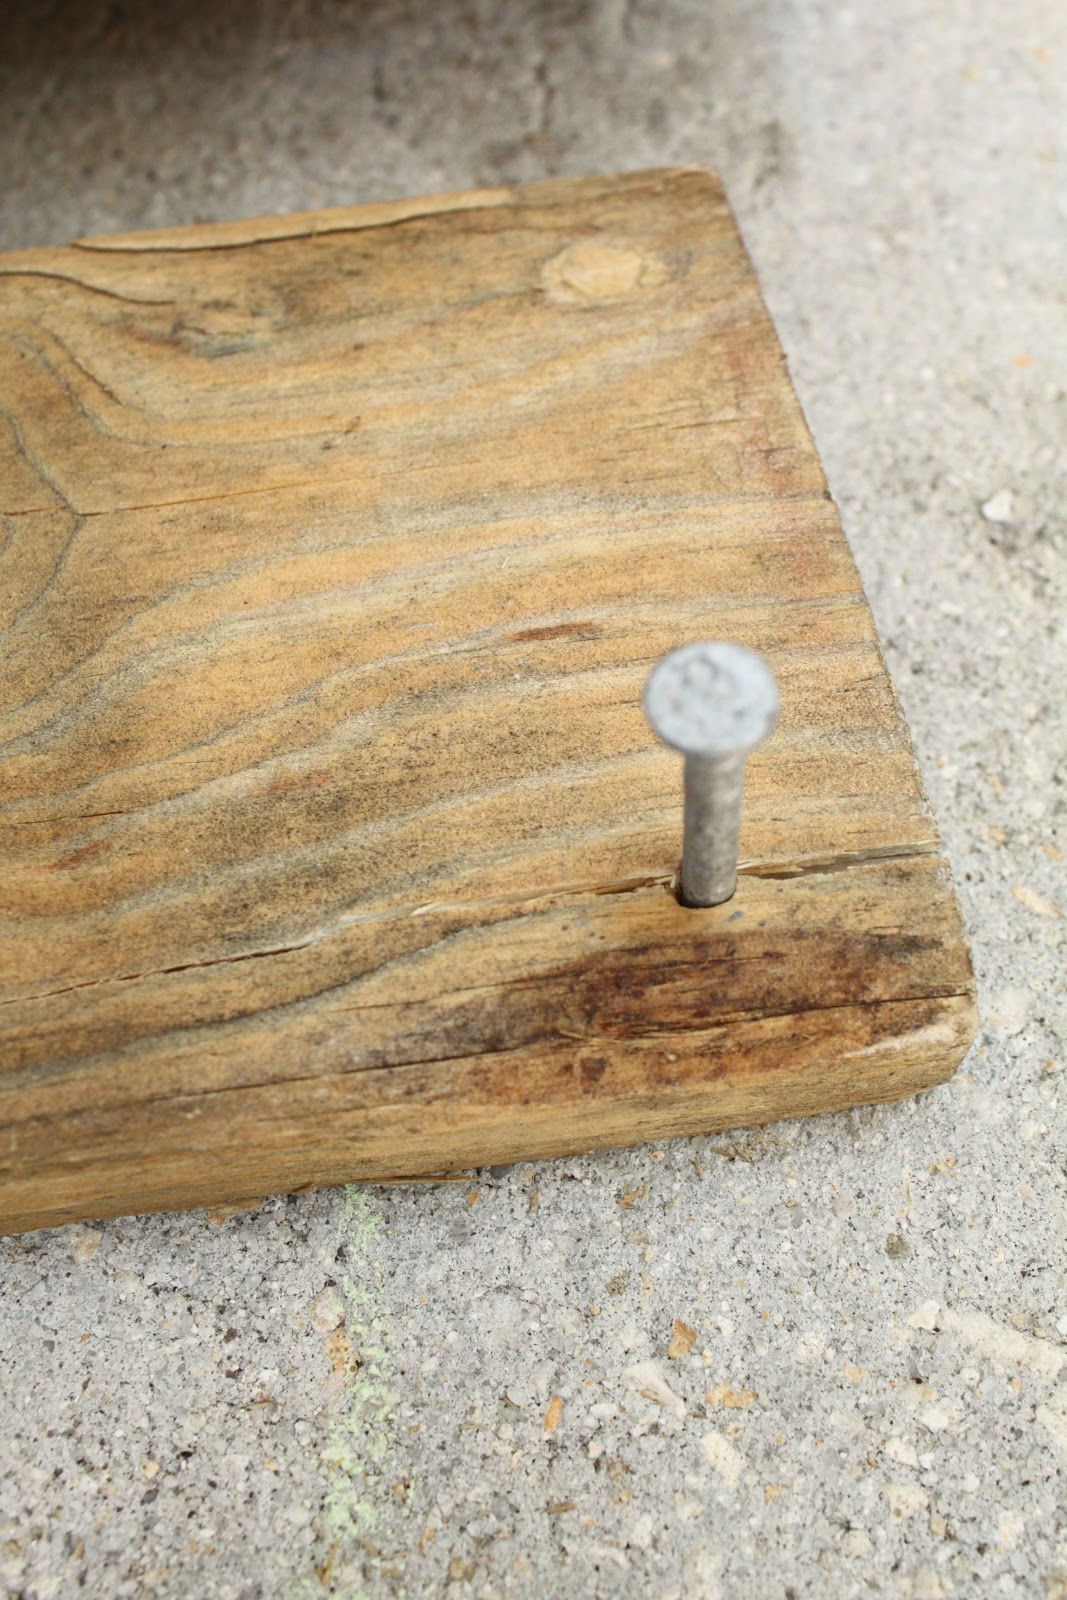
My first attempts to join the boxes with these nails did not work. The nails were too big, were hard to get through the wood and then they split it.
Next I had to get out my drill, E.B. and try to find a way to get the wood attached. E. B. is turning out to be a dream come true. I forgive him now for being difficult at the beginning of our relationship. He's a keeper! Long may he live!
None of our nails were the right size and I only had bright shiny screws. I went ahead and used the screws on the first box because I was desperate to just get moving. When the box was complete, I wasn't happy with the look of the screws. I had left the wood of the box very rustic; shiny screws just didn't match that aesthetic.

I got some "new" old nails at a garage sale for 25 cents the day after I made this box. I came home and made two more boxes using the "new" nails. They are dark brown and look rusty. Perfect! I drilled a tiny hole to help get the nail started and I glued each box together with wood glue as well. They are still very "primitive", which is just a nice way of saying "amateur". However, when I make these for people as gifts, I'm presenting them as "rustic" or "primitive". Think they'll buy that?
With each box I made, I realized something that I should have done the last time, and by the time I was had finished the third one, I pretty much had my system down pat.
That included:
- sanding all wood first, even if you think you want it rustic. Rustic is no excuse for splinters.
- using wood glue to hold the pieces together
- having all tools at my fingertips:
- extension cord
- sander
- sandpaper
- drill
- circular saw
- hammer
- pencil
- measuring tape
- wood glue
- safety goggles
- reading glasses
- cold drink
- wet rag
- nails
- needle nose plyers (for pulling out errant nails)

The first box I made got populated with white vases and candles and was placed on the big coffee table. Nice, but I was underwhelmed with the white. Of course, I also have burlap under the wood, which is too similar in color. So it was a bit ho hum, even with the flowers. I really made this box for the dining room table, but it was too much work to set up for a quick picture. I was happy to see that it worked here too.
Since the white items were just okay, I took the bottles I painted...


and added them to one of the three wood boxes I pumped out this weekend...


I like the color here and will love it when I have a few more done to add to the collection, along with the final accents. As for the box, I'm thinking a rope handle or some other pull on each end might be nice. We'll see.

Of course, I still like the color of this little bird too.

Thre bottles look nice, but more would be better. As soon as I mix some more paint (none of the colors I have is really right), I'll do a few more. The one on the left needs another coat. I stuck a flower in there before it was dry and ruined it. Be patient if you do this and use a hair dryer to speed up drying if you just can't wait.

I also sanded the lid to the iced tea bottle, which was one of the ones I painted.

I managed to eventually get all the paint off of it, but then washed it and sat it on the sink to dry, where it promptly rusted overnight. I got the rust off, but it just shows that you have to be careful about getting the bare metal wet. Sealing it is probably necessary.

The tea bottle says it right: Homemade goodness!

And just for fun, here is the companion birdie to the orange one I like so much.

And finally, the twine and the sanded lid finish the look...almost. There is one more thing I may do to the lid, but that will have to come another day.
For now, that's what I've been up to this week and weekend, along with my house work, yard work and junk excursions, which netted me a few good finds. I'll post those later if I get a chance.
Hope you had a fun and rewarding weekend!
I'll be sharing this with:
One Creative Weekend @ One Creative Mommy
Share It @ The Winthrop Chronicles
Knick of Time Tuesday @ Knick of Time
Inspire Me Monday @ Create With Joy
Nifty Thrifty Sunday @ Nifty Thrifty Things
Get Schooled Saturday @ Too Much Time
Spotlight Saturday @ Classy Clutter
Show & Tell Saturday @ Be Different Act Normal
Saturday Nite Special @ Funky Junk Interiors
Say G'Day @ Natasha in Oz
Hot Fun in the Summertime Party @ Somewhat Quirky
Fabulously Creative Friday @ Jennifer Rizzo
Show & Tell Friday @ My Romantic Home
Frualicious Friday @ Finding Fabulous
Hodgepodge Friday @ It's a Hodgepodge Life
Fridays at Redoux @ Redoux Interiors

Tickled Pink @ 504 Main
Inspiration Friday @ At the Picket Fence
Simple & Sweet @ Rooted in Thyme
Feathered Nest Friday @ French Country Cottage
Home Sweet Home @ The Charm of Home
Creative Things Thursday @ The Vintage Farmhouse
Delightfully Inspiring Thursday @ Delightful Order
Wednesdays Adorned from Above @ Adorned From Above
Live, Laugh Party @ Live, Laugh, Rowe
Made You Look @ Made in a Day
Share Your Cup Thursday @ Have Another Cup of Mrs. Olson
Time Travel Thursday @ The Brambleberry Cottage
Open House Wednesday @ No Minimalist Here
What's It Wednesday @ Ivy & Elephants
All Star Block Party @ Full Circle Creations
Primp Your Stuff @ Primp
Wow Us Wednesdays @ Savvy Southern Style
Your Whims Wednesday @ My Girlish Whims
Cowgirl Up @ Cedar Hill Ranch
Be Inspired @ Elizabeth & Co.
Craft & Tell @ Cherished Bliss
Open Call Tuesday @ Salt Tree
Tips and Tricks Tuesday @ Stringtown Home
Tuesday To-Do @ The Blackberry Vine
Show Me What You Got @ Our Delightful Home
Metamorphosis Monday @ BNOTP
Terrific Tuesdays @ Adventures of a DIY Mom
Motivate Me Monday @ Keeping It Simple
Craft-O-Maniac Monday @ Craft-O-Maniac
Manic Monday @ Serendipity & Spice
Mop it Up Monday @ ISBMTF
Hey Liz! Absolutely love the wood box you made! It's awesome! And I also loved those paper plate boxes, and decided when I saw hers that I just had to make them, too! Will probably make them this week. And yours look great. :o)
ReplyDeleteThe bottles look wonderful, too! Love the colors, and they really pop in that box!! Yeah, the chippy thing can be a pain, but the look is just so worth it. Thank you for the shout out!!
Have a wonderful 4th!!
Hugs,
Becky
I love your pictures! I'm working hard to make my photos better and your site inspires me! Love the baby lizard picture. :)
ReplyDeleteGorgeous photos, I love all of the nature photos. And those boxes you made are very impressive, and the bottles are too cool too. BTW, you look great in the photo. You should see the ones my daughter recently took of me from behind. (Fortunately I'll spare you.)
ReplyDeleteWhew! I'm tired just reading this post. Love, love, love the wooden boxes you made. It looks amazing on the table with the painted bottles - gotta try that.
ReplyDeleteEven with your projects 'somewhat' complete...you've accomplished quite a bit! You should be proud!
ReplyDeleteI love what said about not waiting to learn to use the tools; and be able to do it yourself. I CAN AND WILL DO IT MYSELF. My problem. I have an inner artist inside. You know? the type that doesn't want to show their work until it is 'officially complete'?!!!
So...the problem? The Honey. Since he has retired; (this sounds lame before I even say it, but it's the truth and a point of contention with us) ... he interferes with my creative MO-jo!
As soon as I start gathering materials to start a project...in he comes, wanting to know what I'm doing, and then he starts telling me how to use the 'hoodis' and not to let the 'thing-a-ma-jigger' get to close to the 'whats-it'... and before you know it. I'm done. I just leave it to him. And he finishes it.
Totally squelching my creativity, ARRRGGGGHHHH!!!!!
What I'm saying Liz... I envy you, and I'm proud of you at the same time!
Way to go.
Thanks so much for listening.
Next time I'll tell you all about having a pick-up truck, wanting to curb shop...but never going anywhere alone! (he doesn't like curb shopping) or hunting the free listings on Craig's list! .... what is a frugal zealot to do with herself?
Pat
Your photos are all gorgeous. I can't believe you found lizards in your house? And to think . . . I hate having to kill a tiny little spider!
ReplyDeleteOh my gosh you've been busy again!! You go girl with the circular saw. I'm sure the lizards headed for the hills when they saw that baby coming out! They were so cute and so was that teeny frog. At least my rabbits are easier to see and so far none have ended up in the house! :) Looking forward to seeing everything you get to buildin'! :)
ReplyDeleteLiz. I am so glad you found yourself some big girl panties and tackled some sawing projects. The boxes turned out great and the bottles added a nice touch. That living room of yours is becoming a magazine piece - I love the colors you added.
ReplyDeleteDistressed Donna Down Home
P.S. Chucks said to always check old pieces of wood for hidden nails and screws - you don't want to saw over them!
i always want to try that colored glass-yours looks great! and i actually paid for 2 of those plant stands at a thrift store that you managed to snag from the trash! lucky you! oh, and of course i'm about to hit that "follow" button!
ReplyDeletegreat job Liz!!So cute ideas!!take a break now and keep making such a lovely things!
ReplyDeleteYour photographs are beautiful -- LOVE that frog and the lizards (from a picture though, not up close and personal!). You've been a busy gal -- love the bottles and box you made!
ReplyDeleteYou had some serious fun girl. I love everything you did. Your space is great. I would love to know what color you used on your tables? hugs, jen
ReplyDeleteYou did have some serious fun on your walk and some really great photos. Love the frogs and lizards but sure wouldn't put my hand around the faucet until they were gone - ugh! Wanted to stop by and say thanks for stopping by and letting me know how much you liked my two toned charmer buffet.
ReplyDeleteLove these colors. Looks nice!!!
ReplyDeleteMarcie @ www.IGottaTryThat.com
Liz, you crazy lady! This is a long post with so much to comment on!!! first - the photography is fab - all the way through. My shasta daisies make double heads sometimes. so freaky looking! they also sometimes make curlyque stems at the top like they were growing around a pencil or something. weird. second - so proud of you using the circular saw!!!! the boxes look great! I usually dab paint over my shiny screws or nails, or use a sharpie. They have paint sharpies now and I think I might get a brown one to use for this purpose. third - I love how the painted bottles turned out. fourth - your house is getting more colorful by the day! Nice job.
ReplyDeleteThanks for mentioning The Decorating Files and my little boxes! You did an amazing job on yours; they look adorable! That's what makes them so great; you can use them for anything. Love that you put flowers in them. I want to try the painted bottles. I have tons of acrylic paint that is screaming to be used on something. And don't even get me started on the box. Way to handle a saw, lady! Great post!
ReplyDeleteOI LIZ,GOSTEI DA IDÉIA DA GRADE PARA ESCORRER A TINTA DOS VIDROS,VOU COPIAR DE VOCÊ VIU?BEIJOS.VALÉRIA.(BRASIL)
ReplyDeleteLove your photography...and the wooden box is fab, so versatile!
ReplyDeleteThe bottles, how awesome are they? Love the colors.
Pretty dahlias, one of my favorite flowers!
I love your flower pictures! And your wooden boxes are great. Thanks for sharing at the All Star Block Party.
ReplyDeleteHolly
Found you thru Revi- and so glad I did!
ReplyDeleteI made painted tea bottles just like yours last night, but haven't done the lids.
Thanks for the input there! I can't bear to throw out bottles that say homemade goodness on them !
Honey Mint is my fav.
Looking forward to exploring here,
Tina
The wood box turned out great and I love the painted jars. Your photos of the flowers and frog are beautiful!
ReplyDeleteYou've been one busy lady with so many projects! The wooden box you made is terrific and looks great on your coffee table. Your photos of your flowers are beautiful as well.
ReplyDeleteMary Alice
The wood box is just great and the bottles are creative and I love the colors. I saw you at Home Sweet Home
ReplyDeleteCynthia
P.S. I am following you via email I would love for you to follow me via Linky or email I think you will enjoy cloches and lavenderso check it out.
ReplyDeleteCynthia
I just found your beautiful blog over at Sherry's The Charm Of Home..I'm now following you as I love your style. Love that you love color too! I like color..Those bottles are beautiful along with everything posted..and that double headed dahlia is a lovely sight! very nice...
ReplyDeleteI swear, I LOVE everything on your blog! firstly, all the colours... that's what got me, and the painted bottles. and the crates, the beautiful blues, greens, and cream in your parlour.. everything is so lovely. I am gonna follow you, because I feel inspired! I have a ton of bottles, I wanna paint them, and my parlour coffee table is soo dull, I wanna paint that too! just not sure what colour yet? but I sure am loving that pretty bluish green table of yours!
ReplyDelete-gina
Since I've already made a LONG comment on this post I'll just say thanks for coming by the party! Hope to see you every weekend in July! Use those tools!
ReplyDeleteThat little scene just went from good to better, how darn cute!
ReplyDelete~Bliss~
came over from brambleberry cottage all your projects turned out so awesome thanks so much for sharing them Have a great weekend
ReplyDeleteOh my goodness everything looks so pretty! I am new to your blog. Glad I found it!!
ReplyDeleteWow, that's a whole lot of projects getting done in spite of the heat! Nicely done!
ReplyDeleteAwesome photos...and what a story! You got so much done!
ReplyDeletelove that bird's nest photo by the way..beautiful!
I love the bottles! We recently did a large chuckwagon style graduation party and so I had everyone saving bottles and cans for centerpieces. Now I have like a million (almost) bottles of many shapes and sizes. I love this idea and think it will be my craft for the day! Thanks for sharing your resourcefulness! :)
ReplyDeleteI love your bottles and your box turned out fabulous, but what really stole my heart is that photo of the baby lizards on the faucet handle! Thanks so much for sharing it all at the Knick of Time Tuesday Blog Hop!
ReplyDeleteFeel free to join with me to co-host this party (the code is at the party) and come back each day this week for new giveaways, including the gift certificate from Leslie Janson today!
Blessings,
Angie @ Knick of Time
The birds nest is beautiful, and those colored bottles came out great, fun project Check out my blog, I make cards, but also take lots of photos, found a great teacher, and have been learning alot about my dslr. www.king-designs.blogspot.com
ReplyDeleteWow, what a post! Thanks for sharing all your creative ideas on Simple & Sweet Fridays.
ReplyDeleteJody
Love your jars and box! Thank you for joining me at Home Sweet Home!
ReplyDeleteSherry
Featuring you tomorrow! Stop by and link up again!
ReplyDeleteKim@Madeinaday
Those bottles are beautiful, and they are just the colors I have picked for my family room. I will definitely be pinning this and making some! I'm hosting a linky party "One Creative Weekend" at OneCreativeMommy.com. I'd love for you to visit and link up this idea and/or anything else you'd like to share.
ReplyDeleteHi Liz, I found your blog threw Knick of Time and hit the "follow" button before I even finished reading the post when it hit me, are you in Florida? While looking at your pictures I said to myself, "Boy, that looks like home". The reason I ask is I too live in Florida and am quit familiar with the lil' lizards : ). I also have been wanting to make a rustic flower box. That's what I call em at least and your post really inspired me. It's actually what sent me to your blog. Anywhoo, my name's Deanna and it's nice to meet you (even if your not a Floridian : ) ). If ya get a chance, please stop by and say howdy : )
ReplyDeletePS. Your pictures are amazing. I wish I could take pictures like that ~
Cheers : )
You have been one busy gal. Love, love the box and the bottles. Great pop of color. Thanks for sharing with Share Your Cup.
ReplyDeleteHugs,
Jann
Thanks so much for linking up at One Creative Weekend! I can’t wait to see what you link up this week.
ReplyDelete