It's inspiring to wander the blogosphere and enjoy the talent of so many champions of salvaged style as they whip up a new serving of revamped fabulousness everyday, isn't it? People are über talented and so willing to share their ideas, and their tips too. Gotta love that! And those ideas could come in handy sometime. Sometime like, oh, I don't know... how about today?
I will admit that I have acquired a mad case of junk adventure, if that's even a thing. (ha, you know it is). I am a card carrying junk lover, dedicated to the hunt, the discovery that makes a heart leap and do double back flips, the score that makes you drive away feeling like a thief who has just pulled off a heist and the nitty gritty of a redo that instills a sense of accomplishment, the kind that is oh, so satisfying.
Putting a good dose of elbow grease into the process of bringing new life to weathered and worn treasures that would otherwise be facing the end of days is a joy... despite the sweat, blood and tears, literally. The grungy treasures pile up in all corners of the house, because I just know that this one is a keeper, that the one over there must certainly be restored, without question, and the battered little thing I found partially hidden beneath some moldy upside down furniture on my way home from work could be marvelous one day. Yep, it must be snatched and saved.
What it will be, I haven't a clue... yet. But it most certainly must come home with me so we can find out together.
Enter the retro bedside table.
Despite my passion for projects, forever will I marvel at anyone with a just do it attitude toward tackling the process. The ability to step in fearlessly and give things a try without certainty of outcome is not a trait I possess, and I have no idea how to acquire it. How do people do that? For me, the what if's gnarl my stomach into knots and cause me to spend inordinate amounts of time convincing myself it won't be the end of the world if it doesn't turn out as planned.
"What if this idea isn't the best way to go?" "What if that color ends up wrong and I waste paint and time and have to do it again, and again (as if that hasn't happened a time or two anyway)." And one of the worst project stallers... "What if I drill the holes (cut the wood, remove the paint, etc.) and then I ruin it or I change my mind or whatever?" Then what? Huh? And there are the revamps that get started but then get left in process for the final inspiration to hit. That final inspiration can sometimes take a while.
With that said, you might understand why it's been almost a year since I found this little guy in a pile of discards outside a home nearby and yet it sits without it's final touch of bling to top it off and make it ready to face the world.
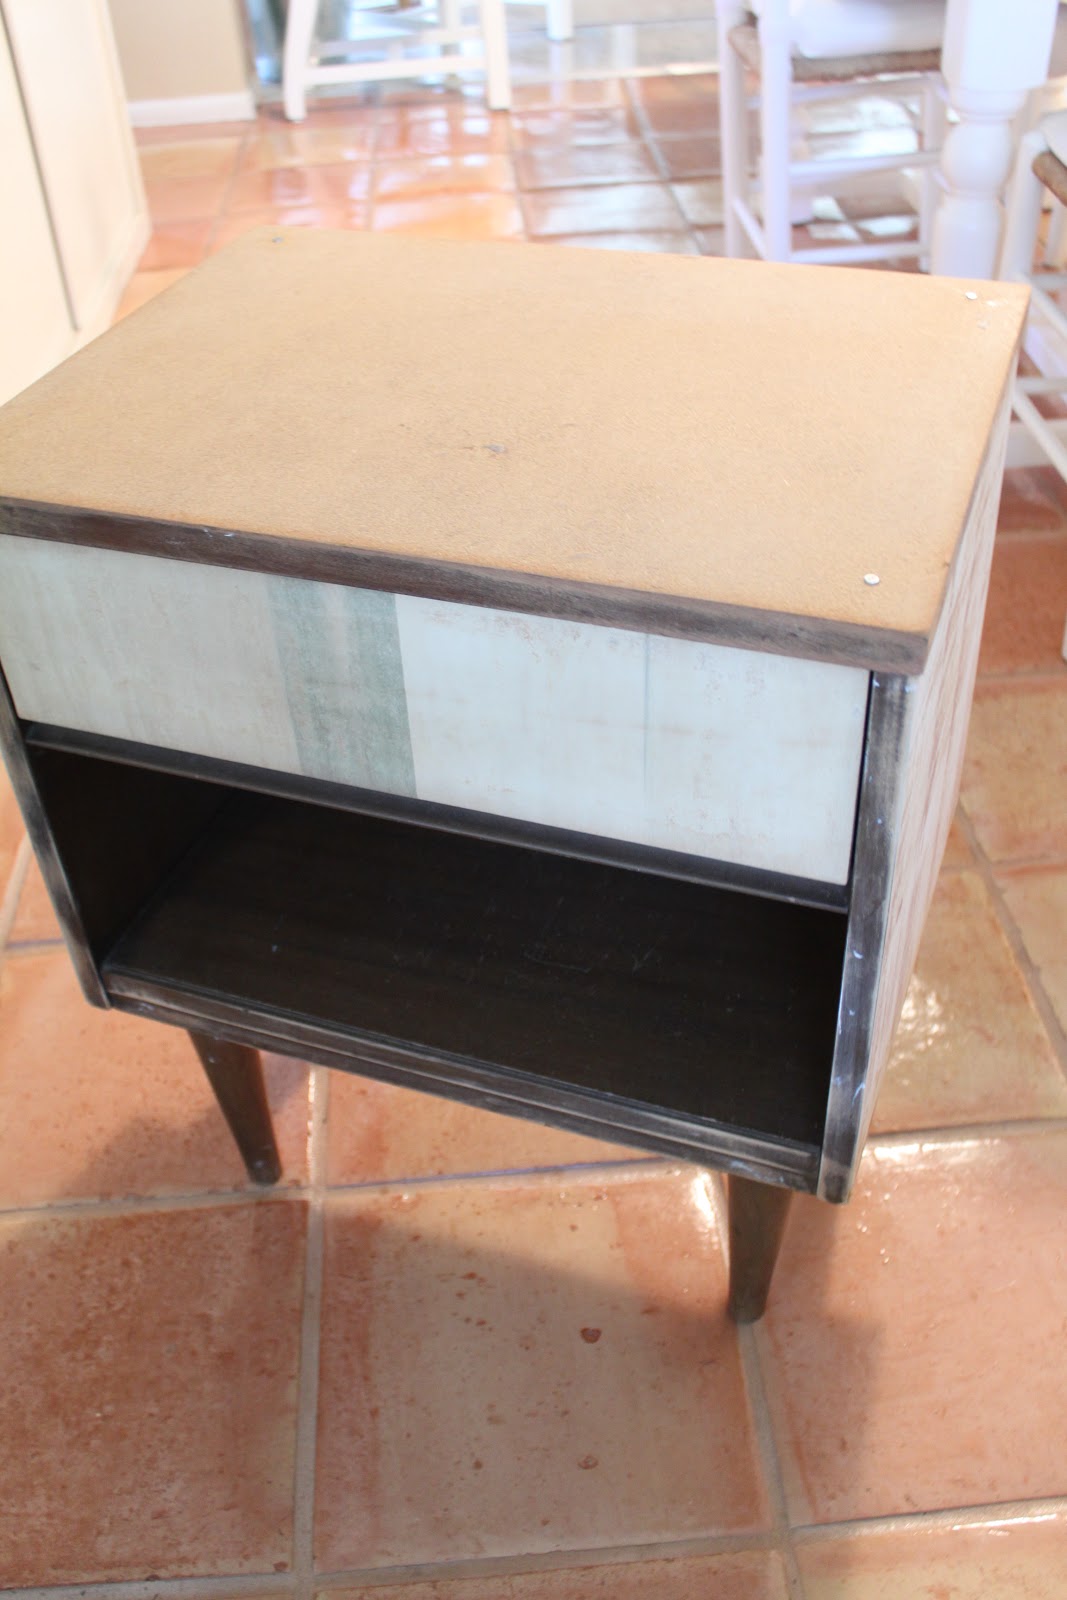
When I found it, the top was unattached, the laminate chipped off, and of course the finish was hazy with stale smoke and reeking of the same, but this was one of those nostalgic pieces that called to me from back in the day, way back on Honeysuckle Avenue. Mom and Dad had a bedroom set to which this could have been a companion piece. The style and the age caught my eye and beckoned me to reminisce with it while it spoke to me of my youth. "Love me, save me...make me beautiful," it begged. But what to do with a little solitary orphaned bedside table? It mattered not. I had to have this treasure from the past.
Removing the laminate parts and preparing the wood for the embellishment to come.
It didn't sit for long before I began to give it a good going over because I actually had an idea for it. Since it was an orphan, it could easily be a funky piece and make a statement as it goes solo through this life. It would find its own niche in the world via a splash of pizazz. Now, I'm not actually much for going rogue. I tend to stick to sensible solutions and rarely have I been known to venture into crazy town. Well, not in the decorating department anyway.
All stripped bare so I can dress it up and send it out to see the WORLD!
But being as this little guy was all squares, and I had a laminated map I'd bought to have on hand so I could try and cover something with it one day, I thought, what the heck! No curves to maneuver (and ruin). No great outlay of cash in case of disastrous outcome. This might be my chance to finally show a little moxy... or perhaps just be like regular folk who take such seemingly inconsequential risks and give things a whirl. And then I'd know if covering things with maps was all I'd cracked them up to be in my mind.
And so I began. Unfortunately I cannot for the life of me find the shots I took with maps lying about all over the floor. (I cannot understate the value of being organized with one's photos, especially at this moment when I really want those images!) It took quite a bit of measuring (scaredy cats like me always measure more than twice - way more). I even went and bought a metal square edge because cutting paper correctly is practically impossible, and I stink at measurements and calculations.
I took my time, measured and figured and worked out where all the pieces would go and decided against covering the edges, which was definitely the right choice (yea! I made a right decision!) in order to have enough map and so that the parts wouldn't be placed too awkwardly. In the end this was the way it all had to go, and the part I would have liked on the front couldn't go there. I forged ahead.

Waa laa! All dressed up, but no jewelry.
The map was glued on with Mod Podge, some of the glue on the wood and some on the back of the map, and I made sure it was good and tacky.
Laminated maps are the way to go, by the way. No worries about the paper falling apart. I made sure to
work carefully and squeegie the bubbles out, securing the edges with plenty of glue so they wouldn't peel up easily and repeatedly smooshing it down to make sure it was bonding well. The legs and the wood around the edges got a new coat of paint. I actually need another coat on the legs, but all in all, it was a success, although not without a few hairy moments where I was quite sure I was gonna screw it all up. But that's me for ya.
The drawer did not originally have hardware on it; it wasn't necessary because it was designed with a notched area for pulling it open. However, I could see that I was going to have blue space that looked empty once I was done and I figured I'd put a cute knob or handle of some sort there for interest. The perfect piece has turned out to be a challenge to find.
I found a handle from Anthrpologie that I wanted after nixing a number of ideas, and Cally was kind enough to buy it for me. I would have never spent $8, (or was it $12) for a handle. I believe in waiting to find something cheap, free or on clearance. However, a year is a long time for a world player like this little beauty to sit in my room collecting dust awaiting a seemingly simple finishing touch like a handle.
So the question is, do I leave it without a handle or drill two holes, hope I get it right (agh!) and go with this one?
Can you imagine this on the front of the drawer? I'm not sure anymore if it's the way to go.
The metal on it looks black next to the brown wood and I'm not sure there's enough black in the map to bring it out. Definitely don't want to drill and be sorry. What to do? Does it matter? This is the way so many of my projects end up, stalled in the land of limbo. It seems I have found that land here on my precious little map table.
I'm open for suggestions.
If anyone has a thought on the handle situation, please let me know what you think in the comments!
Please help me out of my indecisive land of limbo.
Thanks!